4 Vinyl Siding Installation Tips
 Chuck Chura
During my time in the industry, I have learned to appreciate the value of a good installation and the technical features of our products. Our products deliver amazing results for homeowners, but they can only function at their prime when installed correctly. I see common vinyl siding installation mistakes in the field, and I know you might, too. So, I recently reached out to Jan Byer, Technical Services Manager at Westlake Royal Building Products, who has more than 40 years of experience, to talk about how to tackle these repeating issues. Join us as we share the four common vinyl siding installation topics that Jan often addresses with dealers and installers.
1. Prepare for Temperature Fluctuation
Jan has a Golden Rule for vinyl siding installation, “Always manage the movement of the product.” All polymer products expand in the heat and contract in the cold. Most times when an installation or the product fails, it is due to how it was installed. We typically see that the installer did not understand the ways the product can expand and contract through temperature changes.
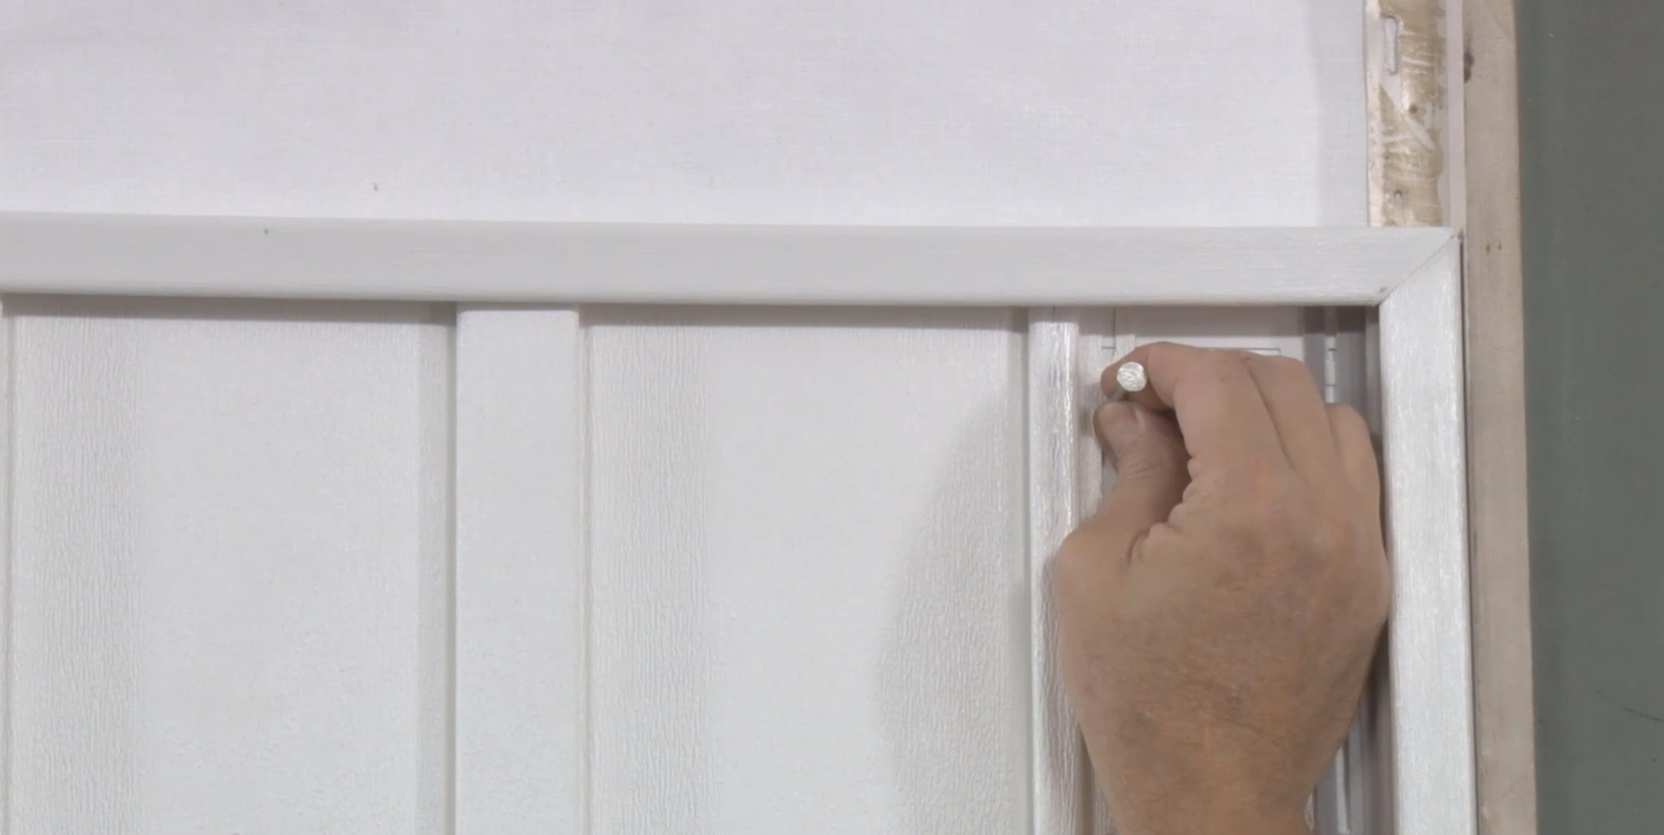
Accessories, for example corner posts, must be able to expand just like the siding. Jan shared, “For this example, installers must place a nail in the very top slot loosely and then nail every 12-16” in the center of those slots in the remainder of the corner so the corner can expand downward. We recommend installers keep about 1/4” space between the panel and a soffit, and a 1/2” space between the bottom of a panel and above the deck surface.”
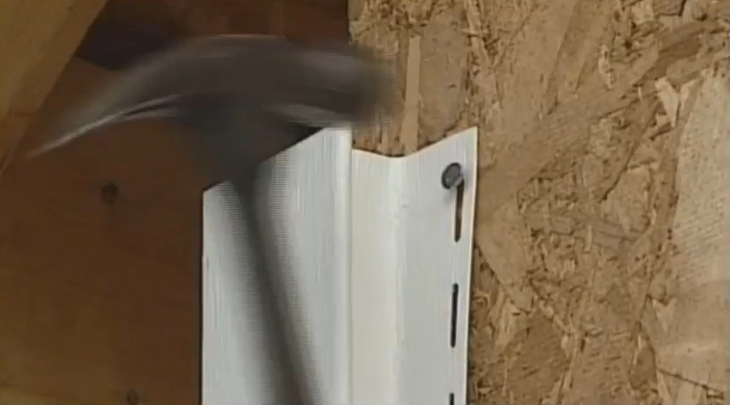
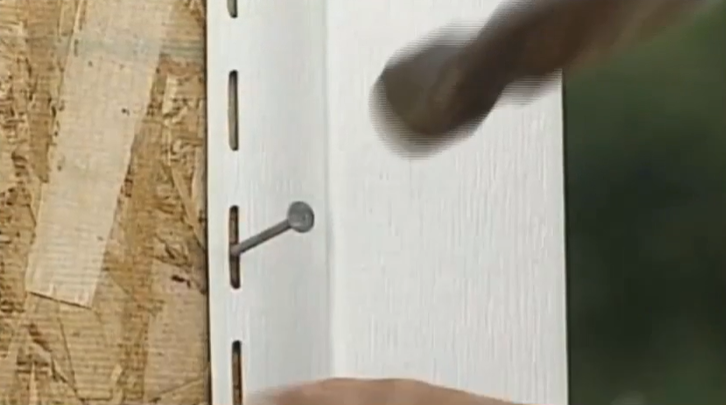
Panels are the same as accessories, and most know, but it’s important to always nail loosely and keep about a thickness of a dime between the head of the fastener and the vinyl itself. Gaps in the corners are where we see most of the issues. We sometimes see the installer hangs the panels correctly, but there must be a gap between the end of the panel and the inside of the pocket of the corner or j-channel.
“Today’s homeowners are really attracted to the darker siding and allowing movement is especially critical with dark colors because these products heat up and cool down quickly,” Jan said. It is important that installers keep a proper gap between 1/4” if above 40° F and move to 3/8” below 40°F. Surprisingly, for dark colors, it does not take much to reach 100° F.
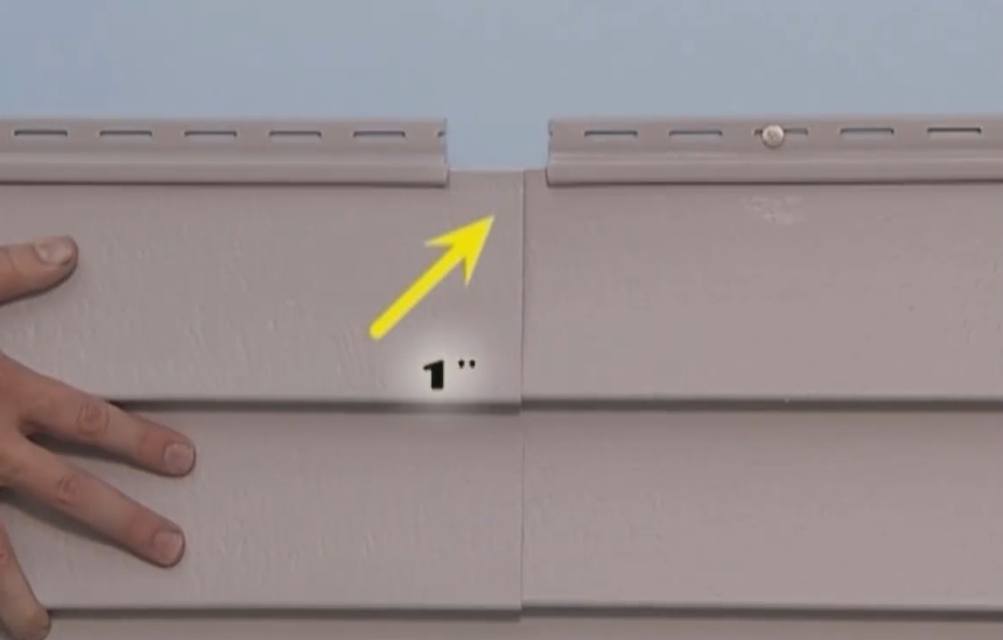
2. How to Properly Lap Panels
The standard vinyl siding lap measurement is 1”. Jan confirmed, “Installers should not go over 1” because it can bind the panels up and create gaps in seams. And you don’t want to be under 1” because in the winter, it can contract and make the panels come apart.”

3. How to Ensure a Good Board and Batten Installation
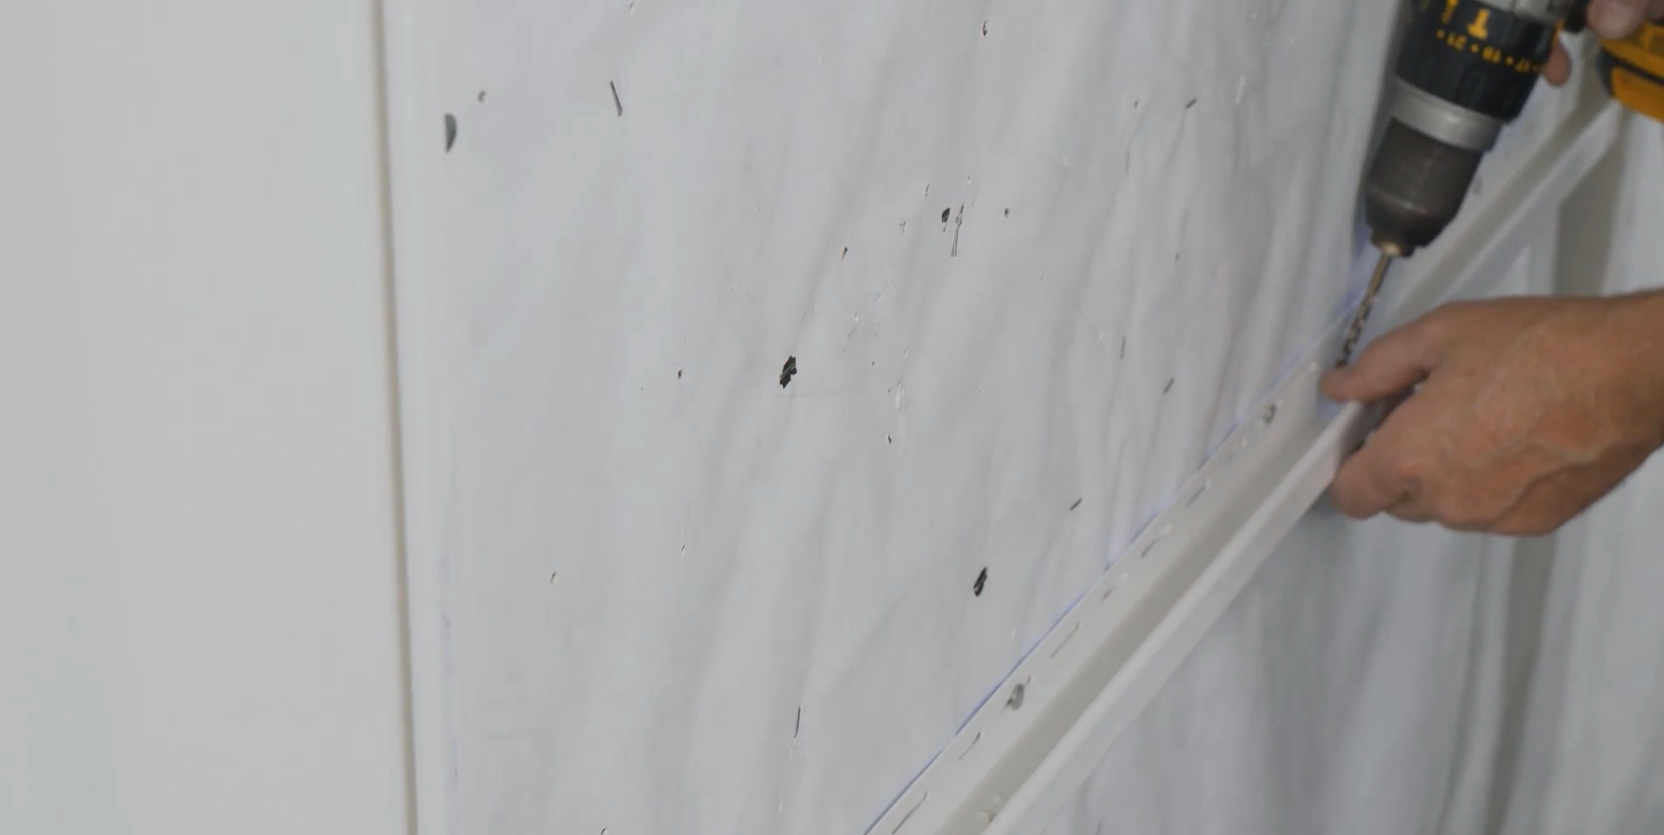
Board and Batten panels are increasingly popular, and we find some installers have not worked with it enough to know proper installation. Jan shared, “It is important to note Board and Batten panels also expand and contract and may not do so at the same time. Therefore, there must be a channel at the top and the bottom of the panels. The same for around windows, doors, and any other obstruction. The channel helps conceal the movement of the panels while giving it room to do so. It’s always a good idea to drill a 3/16” diameter weave hole about every 24” or so in the bottom of the channel to allow water to escape.”
When measuring the height of the panel, measure to leave a 1/4” top channel and 3/8” in the bottom channel. Leave these gaps no matter the temperature at time of installation or how tall or long the panels are. Be sure to install a nail loosely at the highest spot of the top slot on each panel. Then, finish nailing the panel at 12” increments, in the midpoint of each of the remaining slots. Each of these nails must be installed loose (leaving a dime size thickness). At the end of installing each panel, be sure the panel can slide up and down easily.
4. How to Transition Horizontal Vinyl Siding to Shake or Shingles
Shake and Shingle are trending siding options for gables, and we know it can be tricky to transition to them from horizontal vinyl siding. Jan shared his tips to make it a seamless transition. To begin, you must terminate the vinyl siding and begin again with the shake. The vinyl siding and shake siding will not lock directly together. The easiest method is to terminate the vinyl siding in the same way as you would normally with a j-channel. Inside the j-channel, add a piece of finish trim, then a piece of flashing, and the starter strip for the shake product.
The shake starter strip should be up off the surface of the flashing because we need enough space for the bottom lock underneath the starter strip and up and engaged into the strip. There are several methods that you can use, but all of them begin by terminating the vinyl siding before adding the shake. We recommend you use all standard installation practices for all products you are using.
The most common issue we see with a failed vinyl siding installation is due to the product being installed too tightly on a home and not allowing the product to move naturally with the temperature outside. As the temperatures fluctuate, the product will move slightly and if there isn’t a place for it to go, you may find buckling or reveals. If you follow these four tips, you are likely going to find vinyl installation to be seamless and the product will not fail. If you have any other questions about our products, you can view more resources, contact Palmer-Donavin, or reach out to me, Chuck Chura, at 614.315.8467 or cchura@westlake.com.